
I used to splurge on those "artisan" breads in the local grocery store until I came across this recipe for Amish Loaf Bread at Suzanne McMinn's fantastic blog, Chickens In The Road. Among her adventurous stories of self-sufficiency and farm life, she has a huge database of recipes called Farm Bell Recipes - it's incredible! In fact, go over there right now and check it out...oh, and then come back!!!
Anyway, turns out this recipe for bread is excellent - Both for eating immediately with some of your homemade jam and for freezing the dough and baking at a later date!
Ingredients:
2 Cups Warm Water
2 Packets Yeast
2/3 Cup Sugar
1 1/2 Teaspoon Salt
1/4 Cup Vegetable Oil
5 1/2 (or a little more) Cups Flour
In large glass bowl dissolve the sugar in the warm water and stir in yeast. Allow to proof about 5-10 minutes until it looks foamy.
 |
| Not Foamy |
 |
| Foamy! |
Mix in salt and oil to the yeast. Mix in flour 1 cup at a time. You can use your kitchen helper for this!

When dough has formed a ball, knead on a lightly floured surface until smooth (not sticky) about 5 minutes.

Wipe down your previously-used glass bowl and oil it well. Place the dough in bowl and turn to coat surface of dough with the oil. Cover with plastic wrap that has been sprayed with non-stick spray (trust me on this one). Cover with a towel and put it in a warm area. Allow to rise until it has doubled in bulk.


 |
| What's happening under there??? |
 |
| Woah! |
Knead the dough lightly and cut it in half. Shape it into loaves and place into two well oiled loaf pans. Cover both with sprayed plastic wrap. Put one loaf in the freezer (more on this loaf later). Cover the other loaf with a towel and allow to rise for 30 minutes.


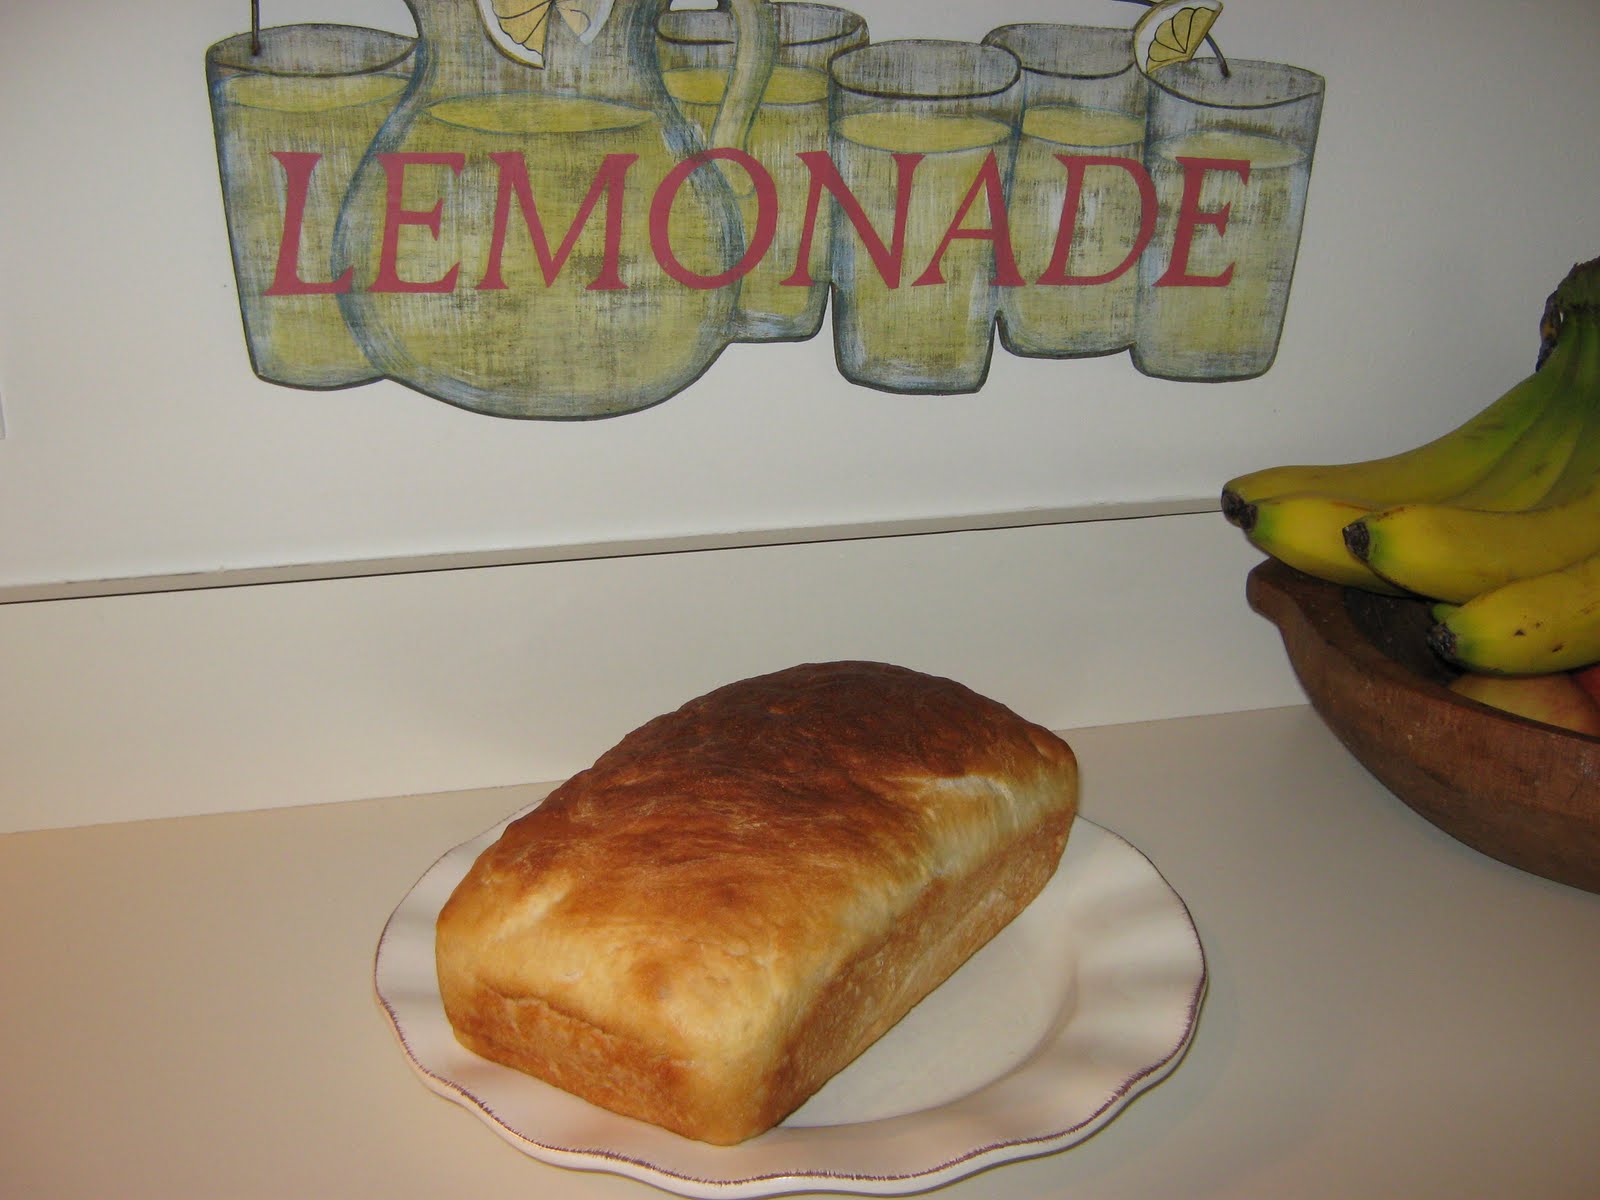
Bake your bread in a preheated over at 350 degrees for 20-30 minutes or until the top is golden brown.

Let your bread sit for at least 15-30 minutes in the pan after it comes out of oven to finish setting up...then dig in!


For the Freezer Loaf: After about 8 hours, take it out of the freezer, remove it from the pan, wrap it in plastic wrap & then put it in a labeled freezer bag. It will keep in the freezer for up to 6 months. When you're ready to use it, unwrap it and put it in an oiled loaf pan directly from the freezer. Cover with oiled plastic wrap and a towel and put in a warm place for about 3-4 hours. The dough will thaw and rise at this time. After that, follow the instructions for baking!

This bread will last a few days in a sealed zipper bag (no preservatives, you know). It also makes EXCELLENT French Toast!
Fake-It Yourself Breakdown:
Amish Loaf (Pantry Items $2.00), Yields 2 Loaves
Total Fake-It Cost: $1.00/Loaf
Compare to Spring Mill Bread Co. Peasant White Loaf ($4.99 Each)
Total Fake-It Savings: $7.98
** If you liked this, check out my other Recipes!**

I'm on a mission to find a good, easy loaf of homemade bread. I'll try this-thanks:@)
ReplyDeleteReally like this recipe..I am going to try it!! I love baking bread and finding new recipes is always a fun experience!!
ReplyDeleteSounds and looks great! I make my own bread and am always eager to try new recipes. Thank you for sharing this one with us.
ReplyDelete~ Tracy
Oh Yum! I can almost smell that bread baking! Thank you for the recipe. I can't wait to tr it!
ReplyDeleteI made this today and it was wonderful!
ReplyDeleteI can't wait to try this recipe!! I'm checking out your other ones too!! Thanks for joining my blog party Simply Creative over at 365days2simplicity!
ReplyDeleteAngela
very nice loaf of delish bread I will try to do this
ReplyDeleteKAT
I make this all the time-except I go ahead and bake both loaves. I freeze one after it's cooled down by wrapping it in a paper towel, then plastic wrap, and then foil and it keeps perfectly for months. I just pull the loaf out a few hours in advance to give it time to thaw, and we've always got fresh,homemade bread at our fingertips!
ReplyDeleteMy two girls and I just made this recipe. We cooked both loaves (I've got plans). My oldest, 7yrs old, said, "Delicious!" Her eyes actually rolled in response to the deliciousness. It was a fun project, the girls had a good time, and it was yummy!
ReplyDeleteThanks for the post!
Does this recipe work in a breadmaker machine?
ReplyDeleteGreat Question! I think that it would be fine in a bread machine, but cut the recipe in half as it is likely too much dough for the machine to handle!
ReplyDeleteCheers!
Heather Bea
Found this thru Pinterest. So happy I did, baked both loaves and half was gone within minutes. My 3 yr old loved it too. I haven't made bread for a long time, like maybe once in high school. :) so it was really like I was making it for the first time.
ReplyDeleteThank you for such a simple, easy, yet oh.so.delicious bread recipe! I was always afraid of cooking with yeast, but it is so much easier than it seems! We used it to make turkey melts and they were amazing. Next I want to try it for french toast.
ReplyDeleteDid you use original or quick-rising yeast? It seemed to take a very long time to rise...I was using original yeast.
ReplyDeleteWas referred to this specific post by a friend. SO glad she did. We tried it tonight at supper. One slice left (a husband and twin 2-yr-olds). Not really sure why I bothered to make anything else to go with it! (And really glad I have that extra one in the freezer!)
ReplyDeleteThanks for sharing this recipe! :~)
I made this and loved it with only one exception. I cut the sugar in half the second time I made it. It was just a touch too sweet for me and my family. Half the sugar was a big hit.
ReplyDelete